Adventures in Brewing – Beer #8: Earl Grey Bitter Bottling

Charles, 2nd Earl Grey was prime minister of the UK for four years, backing significant reform of the British government (in particular, he architected a redistribution of seats in the House of Commons and an expansion of the right to vote). How he came to lend his name to the famous bergamot-flavored tea is mildly mysterious. Like a lot of historical beer origins, there appear to be a lot of apocryphal tales surrounding Earl Grey tea, usually involving a recipe made by a Chinese mandarin. In some accounts, the mandarin is grateful to Lord Grey because one of his men saved the mandarin’s son from drowning. The story that seems more likely to me is that the recipe was specifically formulated to suit the water at Grey’s estate. The bergamot apparently offset the lime present in the water there and when Lady Grey used it to entertain guests in London as a political hostess, it became popular enough that Twinings sought to make it a brand. Or something. But enough about stuffy British politicians, let’s get to the beer!

Bottling of my Earl Grey bitter commenced after two weeks in the fermenter. From observation of the airlock, fermentation seemed to go well for the first two days, but then it dropped off considerably. Given the low original gravity, this was not too surprising, but I gave it the full two weeks anyway.

Post-Fermentation, Pre-Conditioning Earl Grey Bitter

The beer turned out to be a little lighter in color than I was expecting (which is not a big deal or anything), but the aroma was quite nice. A lot of citrus in the nose, which is exactly what I was going after. However, I’m not entirely sure how much of that came from the bergamot tea I used in the recipe. I had also used a small amount of orange peel, which certainly contributed something to the flavor, and it’s also worth noting that Fuggle hops (even when used in bittering applications like I did) can contribute a soft, fruity aroma/flavor to the beer. I suppose one could call this more of a variant on Earl Grey than anything else – something more like Lady Grey tea, which also has orange (among a few other ingredients). Well, whatever the case, it seems like it will be quite an interesting beer.

Final Gravity came in at around 1.010, and according to my calculations, this works out to around 4% ABV (maybe a little more), which was pretty much the target (a little over 75% attenuation, which is pretty good). I had a bit of a worry when I first took my refractometer reading, as it came in at around 5.4°Bx, but it seems that Final Brix is a bit misleading because the alcohol distorts the readings a bit. With the help of the internets, I was able to correct for that distortion, and all seemed well. I also took a hydrometer reading, which came out a little lower than reported above, thus the beer might be slightly stronger than expected (but still around 4.5% ABV).

Another point of interest is that I primed the beer with around 2.5 oz. corn sugar, about half the normal dose. The style is typically not very highly carbonated, so I didn’t want to overdo the priming sugar. Hopefully this will work out to create something with enough carbonation, but still smooth and quaffable. The beer actually tasted ok right now, even in its relatively flat form, so I think a minimum of carbonation would suit this nicely.

That about covers this beer. It’s been an interesting exercise and I can’t wait to taste the final product in a couple weeks. Next up will be a Belgian-style dubbel, though I’m not entirely sure when I’ll get to that and we’re starting to get to the warmer months of the year, where fermentation temperature will get more difficult to control…

(Cross posted on Kaedrin Weblog and Tempest in a Teacup)

Adventures in Brewing – Homebrew Review!

Homebrewing has been a real blast. I mean, I’m not a miracle worker, but I have managed, on several occasions, to turn water into beer. How awesome is that? Even when the results don’t come out as planned, it’s a fun hobby. I reviewed my first batch of homebrew, a brown ale, before I started my second beer (around a year ago), but for a variety of reasons (i.e. laziness), I’ve since fallen way behind on reviewing my beers. So over the course of this past week, I’ve cracked open one of each unreviewed homebrew and gave it a whirl. I suppose I should note the obvious conflict of interest here. While I’m sure you all think of me as a BJCP approved expert and grandmaster Cicerone, my beer tasting notes are highly subjective on even the best day, so my notes on beers I’ve brewed myself might be overly harsh or too lenient. I really don’t know which, and maybe both are present in my notes. Make of this what you will, but since I bore you all to tears with my tedious brewing-day recaps, I figured it’d be worth letting you know how they came out (at least, in my mind and in the probably-no-definitely biased feedback from friends and family).

Homebrew #2: Trappist Tripel – I went a little adventurous for my second brew. High gravity beers are more difficult to brew for a variety of reasons, but I did alright, despite a few rookie mistakes. There are some good things about it, but it ended up with a lot of alcohol character in the taste. It has gotten better with age though, and I think I may be experiencing “waves of maturation”, as sometimes I think this has turned out reasonably well, and other times I think it’s kinda horrible. I still have about a half a case of this left, and with such a high ABV, I think I’ll let it continue to mature (checking on it occasionally). Feedback from friends and family indicates that the beer is rather heavy, which it is… Let’s see how this one treats me:

Homebrewed Tripel

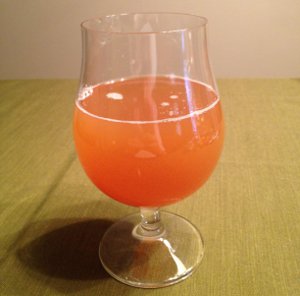
Pours a clearish golden color with a little orange and a finger of head. The smell is quite nice. Typical bready Belgian yeast and spice, along with a surprising fruity character and a not-so-surprising boozy factor. Taste is sweet with that Belgian spice character and plenty of booze, which really asserts itself in the finish and aftertaste. The mouthfeel is full bodied with solid carbonation to start and a little bit of a sticky finish (which becomes more pronounced as the beer warms up). Plenty of warming alcohol character… actually a bit too much hotness here, which is this beer’s one major flaw. Overall, it’s actually gotten better with age, though I wouldn’t call it great. Not bad for my sophomore effort though! B

Beer Nerd Details: 10% ABV bottled (12 oz.) Drank out of a goblet on 3/13/12. Bottled on 3/6/11.

Homebrew #3: Bavarian Hefeweizen – This is, without a doubt, the worst beer I’ve ever made. I’m not sure what went wrong here, but there’s always been a very distinct off flavor here that I can’t quite describe. I want to say it’s vegetative, but that’s not really right. None of the traditional off flavors seem to describe what I’m getting out of the taste of this beer. In any case, at no point has it ever resembled an actual wheat beer, aside from perhaps the yeast character (which shares a lot with Belgian yeasts). Let’s see how it’s doing now:

Homebrewed Hefeweizen

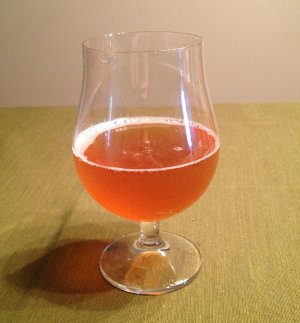
The beer looks pretty enough. Perhaps a little dark for the style, but a nice golden orangeish color with tons of head. When the beer was young, the aromas were dominated by banana, but as time has gone on, the clove has come out more. It actually smells pretty darn good. The taste is better now than it was when it was young, but there are some off flavors present and it still doesn’t taste at all like wheat. There’s an almost tinny undertone to the beer as well. Carbonation is very high and along with the spice, it’s got a bit of a harsh mouthfeel (this isn’t normally a bad thing in my book, but for this particular beer it is). Overall, it’s not a complete abomination and it’s actually drinkable, but there is something wrong with it. (Other folks have told me that they don’t mind this beer, so maybe I’m being to hard on myself, but in honesty, this beer turned out nothing like what I was going for, and so thus I rate it lowly!) D

Beer Nerd Details: 5.25% ABV bottled (12 oz.) Drank out of a shaker pint on 3/10/12. Bottled 5/15/11.

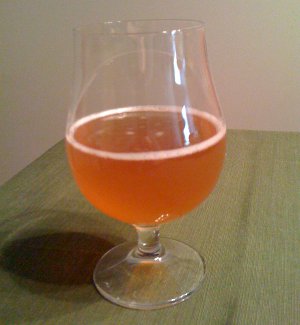
Homebrew #4: Saison – This was the first homebrew I made that I truly loved. I patterned the recipe after Saison Dupont (one of my favorites) and the beer actually turned out that way, so this all makes sense. I was very excited about this batch and impatiently cracked one open after only one week of bottle conditioning. And it was perfect. Beautiful fragrant spices and pale malts, very deep flavors, perfect carbonation and a well balanced, full body. Unfortunately, that perfection hasn’t lasted. The beer is still good, but I perhaps used too much priming sugar, as bottles these days tend to be overcarbonated and as the beer has matured, it’s taken on a bit of that boozy hotness (nowhere near the levels of the tripel, but still there). I think I underestimated how effectively the 3711 French Saison yeast would eat up the wort, as this did come out a bit stronger than I was looking for. If I make something like this again, it will be a little lower in gravity, with less priming sugar at bottling time, and again, I think better temperature control will also be helpful. Anyways, response to this beer has been generally positive, though some don’t like the spicy and overcarbonated nature of the beer. Here we go:

Homebrew Saison

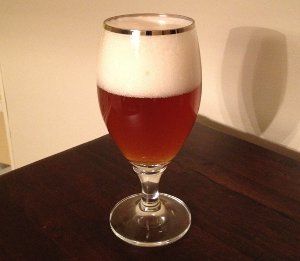
Pours a cloudy golden yellowish color with tons of fluffy head that leaves a little lacing as I drink. Smell is filled with spicy aromas (definitely clove, maybe some banana and bready Belgian yeast. The taste is sweet, but filled with spiciness (again clove), and a mild bitterness in the very dry finish (this level of bitterness wasn’t in the beer on the first week, but it’s not inappropriate either). Maybe just a hint of booze as well. Mouthfeel is very strong, full bodied, and harsh with tons of carbonation. Overall, it’s still quite good, but it’s not even really close to my initial taste of the stuff. B+ (though maybe an A for that first taste).

Beer Nerd Details: 7.5% ABV bottled (12 oz.) Drank out of a goblet on 3/10/12. Bottled on 7/6/11.

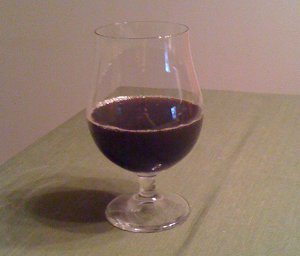
Homebrew #5: Stout – The goal with this one was to make a stout with more than a one dimensional roasty character to it. I planned to emphasize chocolate and caramel in this batch, and for the most part I succeeded. However, the beer does have some issues. No real “defects” per say, just things that aren’t ideal. For instance, the final gravity was around 1.020, which makes for quite a heavy tasting beer – I was hoping for more attenuation here. Perhaps as a result, the head on this beer is pretty lackluster, and it fades quickly. Its the sort of beer that starts off well, but gets to be a bit much by the end of the bottle. Perhaps it will improve with time, but here’s what I’m getting out of it now:

Homebrewed Stout

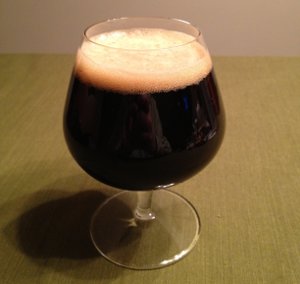
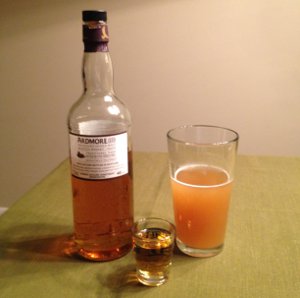
Pours a very dark brown color, almost black (no highlights when held up to light) with a finger of quickly disappearing light brown head. The smell features that caramel malt in full force, with a chalky roastiness also present, maybe just a hint of coffee. The taste is similar, though the roasted malts are more prominent here and it could perhaps have used a bit more hop balance. Still, it’s not one dimensionally roasty, and that caramel and chocolate malt adds a nice complexity to the taste. The mouthfeel is extremely heavy and full bodied. It’s well carbonated, but a little acidic in the finish, especially as it warms up. It’s the sort of beer that starts out well enough, but it really gets rough towards the end of the glass. Overall, it’s ok, in the direction I wanted to go, but it hasn’t quite reached the destination. I think some recipe tweaks, either toning it down (or up!) and using some more hops could help it out. I also need to figure out how to get a little more attenuation out of the yeast… Again, I like this beer, it’s really interesting, but it’s hard to rate it very high when even I can’t seem to finish an entire bottle of it. C+ (would be maybe a B- or B if it held itself together longer)

Beer Nerd Details: 5.5% ABV bottled (12 oz.) Drank out of a snifter on 3/11/12. Bottled on 8/28/12.

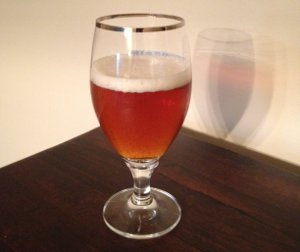
Homebrew #6: Spiced Christmas Ale – Not to toot my own horn, but this is the best beer I’ve made so far (ok, I’m going to toot my own horn a little ). It’s a winter warmer style beer whose recipe was created on-the-fly in the homebrew shop (with a lot of help from the owner). Anchor Christmas was something of an inspiration, but this beer isn’t patterned after a specific version and I came up with the spicing regimen entirely on my own. It’s the beer I’m most proud of, from the recipe and spicing regimen to the way it turned out. Seems to be a popular beer when I give it to others, including the guy at the homebrew shop (I totally owed him a couple bottles thanks to his improvisation), who asked if I entered it into any competitions. It turned out to be pretty much exactly what I wanted, and unlike the saison, it’s stayed that way for a few months now. Ok, let’s toot some more horns:

Homebrewed Christmas Ale 2011

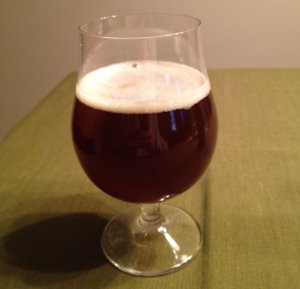
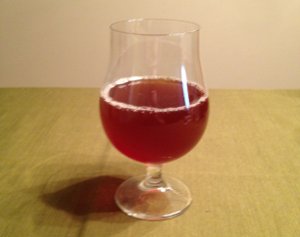
Pours a deep, dark amber color (almost, but not quite brown), with a finger of light colored head. Smells fantastic. The cinnamon and clove come through especially well, though I also get a fair amount of sugary citrus in the nose. A friend described it like it was a snickerdoodle cookie, which is pretty awesome. The taste has a sweetness to it, but it’s very spicy and it has a well balanced, somewhat dry finish. The mouthfeel is a dream – smooth, almost creamy, medium bodied, a little harshness from the spiciness, but still quite quaffable (probably my most quaffable beer). Overall, I can’t believe this beer came out as great as it did. I was worried that I’d overdo the spices (and in a lot of spiced winter beers, the spices are overpowering), but the spices I added balanced out really well. Again, this is probably my best beer, and I think it stacks up well against a lot of the commercial winter warmers I had this year. A-

Beer Nerd Details: 6.0% ABV bottled (12 oz.) Drank out of a tulip on 3/11/12. Bottled on 11/20/11.

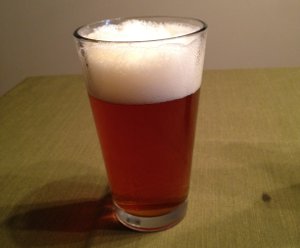
Homebrew #7: Simcoe IPA – My most recent brew, it’s only been 3 weeks since bottling. I’ve had a few of these so far (again, I was very impatient with this one) and damn it’s been good. A little undercarbonated in the first week, but that should have worked itself out by now, so I’m really excited to try this out…

Homebrewed Simcoe IPA

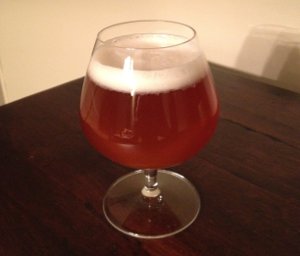
Pours a very pretty golden color with a finger of head that leaves a little lacing as I drink. Smells strongly of grapefruit and pine (interestingly, more pine now than in week 1) along with a nice sugary sweet aroma. The taste also starts off sweet, plenty of that citrus and pine hop character, and a nice, bracing bitterness in the relatively dry finish. Mouthfeel is quite good. Medium bodied and the carbonation has come up to speed too. Not sure how to describe it, but it’s like the carbonation has small bubbles. Actually quite quaffable. Overall, this is one damn good IPA. There’s nothing quite like a super-fresh IPA, but I can’t wait to see how it matures over time as well. B+

Beer Nerd Details: 7% ABV bottled (12 oz.) Drank out of a snifter on 3/10/12. Bottled on 2/18/12.

So there you have it. All in all, I think I’ve got 3.5-4 cases of homebrewed beer left, with another 5 gallons (about 2 cases) in the fermenter right now. Alas, my best beers are the ones that go the fastest, and the IPA was a small batch to start with. Anyways, I’ve learned a lot since my first batch, and I think my past couple batches show that I’ve at least got the basics down. I’d list out some of those learnings, but that’s perhaps another post for another day.

Adventures in Brewing – Beer #8: Earl Grey Bitter

So I’ve had this crazy idea for a while. I like beer. I like earl grey tea. Why not combine the two? The thing that makes Earl Grey tea distinctive is bergamot, which is a sorta orange-like citrus fruit. Very nice aroma and flavor, as evidenced by the famous earl grey tea. I love a little citrus in my beer, so my first thought was that I should just go out and buy some bergamot oil, and add a tsp or two to the wort towards the end of the boil. Unfortunately, food grade bergamot oil is not as common as I thought. Everything I found was for aromatherapy or skincare – for external use only. Now, I didn’t exactly want to make tea beer, but it looks like that’s what I’m going to end up doing. And in fact, I had some Stash Double Bergamot tea laying around, so I figured I could use that to impart some bergamotty character (with the tea hopefully being drowned out by all the malt and hops and whatnot).

The next question was what to use for the base beer. In looking around, I see that I’m not the first person to think of this idea, but other folks seemed to be doing this with something like a Belgian Wit beer. This would certainly highlight the bergamot and tea flavors in the finished product, but I didn’t want a beer dominated by those flavors, so I looked around at some other options. Since I was making an Earl Grey beer, I thought I should try to use an English style as the base. This was also in keeping with my recent affinity for lower gravity beers (or, at least, non-face-melting beer), and I eventually settled on the English Bitter style. The name is a bit of a misnomer – these are not super-bitter beers, though perhaps there’s more hop character than usual for low ABV styles. Still, it seems like a beer that would take on the nice flavors of the bergamot and tea without being overwhelmed either way. In searching around, I found this nice kit from Northern Brewer called The Innkeeper, which sounds rather awesome. I added in some of my tea and, for good measure, some Bitter Orange Peel that I had leftover from previous beers. Here’s the final recipe:

Beer #8: Earl Grey Bitter

March 10, 2012

4 Bags Stash Double Bergamot Earl Grey Tea

0.25 lb. English Extra Dark Crystal (specialty grain)

0.25 lb. Belgian Biscuit Malt (specialty grain)

3.15 lb. Pilsen LME

1 lb. Pilsen DME

1 lb. Corn Sugar

1 oz. US Fuggle (Bittering @ 5.2% AA)

1 oz. UK Kent Goldings (Bittering/Flavor @ 5.8% AA)

1 oz. Styrian Goldings (Aroma)

1 tsp. Bitter Orange peel

Wyeast 1469 West Yorkshire Ale

It’s a mildly unusual recipe to start with and I’m adding my own unusual elements too. Here’s to hoping it turns out well. I started by bringing 2.5 gallons of water to around 150°F – 155°F, then I began steeping both the specialty grains and 3 of the tea bags (I was reserving one for the end of the boil). My hope was that adding the tea this early in the process would yield an interesting, but not overpowering flavor to the beer (after all, I imagine a lot of the character will be lost in the boil). I only steeped the tea for about 5 minutes, leaving the grains to steep for another 15 or so minutes.

Brought the mixture to a boil, added all of the malt extract and corn sugar, waited (again) for it to return to boiling, then added the Fuggle hops. The strangest thing about this recipe is that the second hop addition comes a mere 15 minutes later. This seems like it would provide more bittering than flavor, but I assume both will be present in the finished product (normally flavor hops are added no less than 30 minutes into the boil, as the flavor compounds are lost after long boils). Finally, with about 5 minutes left, I added the Styrian Goldings. About a minute later, I added the last teabag (though I didn’t keep it in the whole time – in retrospect, I should have probably just made a cup of tea separately, then poured it into the boil). And while I was at it, I threw in some bitter orange peel, just to amp up the citrus a bit (in case the tea didn’t provide it).

Off to the ice bath for cooling, which is something I think I’ve got a better handle on these days. I think some of the issues with my early beers were partially due to poor temperature control. And I’d guess that part of the reason my last few batches have come out so much better is that I’ve gotten much better about cooling the wort in an ice bath (I use much more ice now, basically, and it helps that I’m doing this during late winter, when I can open my windows and drop the room temperature quickly). Anyways, got this stuff down to about 80°F – 90°F, strained it into the bucket, and topped off with some room temperature and cold water, bringing final volume up to 50 gallons.

Apparently one of the things that makes this recipe distinctive is the yeast, which seems to have relatively low attenuation (certainly lower than the American and Belgian yeast strains I’ve been using of late), but given the relatively low gravity nature of the recipe, and the sizeable simple sugar addition, I think the result will still be dry enough. The yeast was packaged on 1/16/12, so it’s relatively fresh.

Original Gravity: 1.042 (around 10°Bx). I got sick of using my hydrometer, so I invested in a fancy new refractometer. Unfortunately, I got the variety that only displays measurements in Brix, but the conversion is somewhat straighforward and I have an easier time reading this than my hydrometer. The gravity came in a little below the target, but it should be fine. If all goes well, this should produce a beer at around 4% ABV (maybe even less). Given the alcohol and simple sugar addition, I’m looking at a light (in body, not color), quaffable beer. Fingers crossed.

I plan to bottle in about two weeks time (could probably do so earlier because of the low gravity, but I’ll keep it at two weeks). Since the style isn’t supposed to be heavily carbonated, I’ll probably end up using less priming sugar than usual, maybe 2-3 oz (as opposed to 5). Next up in the brewing adventures will be a Belgian style dubbel, though I need to do some work to figure out a good recipe for that one. After that, who knows?

(Cross posted on Kaedrin Weblog and Tempest in a Teacup)

Adventures in Brewing – Beer #7: Bottling

After two weeks in the fermenter, I bottled the single-hopped Simcoe IPA this past weekend. Fermentation started quickly and lasted most of the first week, despite the small batch. About a week into the process, when fermentation had slowed considerably, I cracked the lid and dropped in another ounce of Simcoe hops. I’ve never done dry hopping before, but it’s supposed to impart additional aromas to the beer…

And judging from the smell in my kitchen during bottling day, I’d say that extra step was worth the stretch! Amazing citrus aromas (grapefruit!), not quite as much in the way of pine, but still a great smell.

Final Gravity was 1.012, which is a little lower than expected, but it could also be that low because the Original Gravity wasn’t as high as I estimated. That being said, I’d say I’m in for something around 7-7.3% ABV, right at the high end of a single IPA (or the low end of the Double IPA). I gave it a taste, and hoo boy, that citrus is huge. Very nice bitterness in the finish too, though I’m guessing that will mellow out as the beer conditions in the bottle. I’m so very looking forward to this beer! There’s nothing quite like a super-fresh IPA, and this is probably as fresh as I’ll ever get to taste…

My IPA, straight from the fermenter

I’m planning on cracking one open this weekend, though who knows if it will be carbonated enough. I only got around 1 case of beer out of this batch, but then hugely hopped beers fade with time, so having a case should last just long enough.

Up next is what I’m calling an Earl Grey beer. The base beer will be a sessionable English Bitter (which is a style that has always confused me, since they’re not actually that bitter), and I’ll be adding some Bergamot oil towards the end of the boil (and maybe even some Earl Grey tea). Should be interesting! After that, I’m going to start working on my Belgian Dubbel for this summer…

Adventures in Brewing – Beer #7: Simcoe Single-Hopped IPA

After some post-holiday procrastination, I finally settled down to make myself a small batch of a Simcoe single-hopped IPA. Hops are one of the 4 key ingredients in beer, and there exists an amazing variety of hops. Most of the bitterness in beer comes from hops, but they also provide flavor and aroma characteristics. Some hop varieties are good for bittering, but not for flavor or aroma. Some are great for flavor or aroma, but not really for bittering. And then there are the utility players – hops that do everything. Simcoe is one such hop. Simcoe is actually a relatively new variety of hop, often referred to as Cascade on steroids (Cascade hops were the most revolutionary of American hops – most notably featured in Sierra Nevada’s classic Pale Ale). They’re a high alpha acid hop (around 12-13%), which makes them great for bittering, but they also impart a huge, distinctive citrus and pine flavor/aroma.

I patterned my recipe on Weyerbacher’s Double Simcoe IPA, though I have no idea how accurate the recipe I used matches that beer (I do know that my recipe wouldn’t be as strong as 9% ABV though). The guy at the homebrew shop mentioned that my grains, at least, were similar to Bell’s Two Hearted (which is another fantastic IPA), but that beer uses Centennial hops instead of Simcoe. Anywho, this is what I settled on (note: this is a small, 2.5 gallon batch, so there’s much less malt than you might expect):

Beer #7: Simcoe Single-Hopped IPA

February 4, 2012

.25 lb. Crystal 20 (specialty grain)

.5 lb. CaraPils (specialty grain)

.5 lb. Vienna Malt (specialty grain)

3.3 lb. Briess Pilsen Light LME

1 lb. Golden DME

0.5 lb. Turbinado Sugar

1 oz. Simcoe (bittering @12.2 AA)

1 oz. Simcoe (flavor, 2 additions)

1 oz. Simcoe (aroma)

1 oz. Simcoe (dry hop)

1 tsp. Irish Moss

Wyeast 1056 – American Ale Yeast

Nothing too fancy here (although damn, Simcoe hops are expensive!) I suppose the Turbinado sugar isn’t a typical ingredient, but simple sugars like that help dry out the beer (which would otherwise have been pretty heavy). Steeped the specialty grains in 2-2.5 gallons of 150° F – 160° F water for around 20 minutes, drained, sparged with another half gallon of water, threw in the can of Light LME, and put the lid on to bring the wort to a boil. During the wait, I scooped out a small sample of wort and made myself a Hot Scotchie. It’s a strange beast, this hot scotchie. I’ve heard many homebrewers talk about it, but details on exactly how to make one are a bit scarce. Near as I can tell, you take a sample of unhopped wort before it reaches boiling, then add a shot of Scotch to it. Jeff Alworth has a decent description:

Brewers would draw off a small amount of the mash as it issued from the grain bed, fresh and warm. To this they added a dollop of Scotch. What happens is nothing short of mystical. Mash runnings are very sweet and flabby–there’s no definition to the flavors. The addition of Scotch somehow reverses all this. Like an electric current, the Scotch animates the grains so that you can taste them in HD. The Scotch is likewise a very clear note, but not sharp or aggressive. It has all the flavor of a straight shot, but it’s floating amid Mom’s comforting malted. Insanely beguiling.

So I took a sample of wort, and threw a shot of Ardmore (it’s a cheap Scotch, but it’s got a nice, distinctive peat smoke character to it that’s not overpowering) in there.

A Hot Scotchie

It was an interesting experience. My experience with the hot scotchie wasn’t quite as revelatory as it seems to be for everyone else though. It was good, to be sure, but I’m not sure it’s something I’d always do. Also, because this is a small batch, I probably shouldn’t have taken that much malt out of the wort – I ended up with a lower OG than I’d like…

Anywho, once the boil begins, I add in 1 ounce of Simcoe hops and start the timer. 30 minutes into the boil, I add the Golden DME and Turbinado sugar. When I do this, the temperature of the pot seems to drop (makes sense because I’m adding room temp ingredients), so I pot the lid back on the pot and bring it back to a boil (I’m not counting these 5 minutes time as part of the boil). Once it’s back boiling, I add a half ounce of hops (the first flavor hop addition). 10 minutes after that, I add another half ounce of Simcoe (second flavor hop addition) and the teaspoon of irish moss. Finally, with 5 minutes left to go, I add the aroma hops (actually sprinkling some throughout the last 5 minutes).

Moved the pot to the ice bath to cool it off, brought it down to about 80° F, strained the wort (removing the hops) into the fermenter, and topped off with about 1/4 to 1/2 gallon of cold water, bringing the final temperature down below 70°.

Original Gravity: 1.068. Definitely lower than I was shooting for (my target was in the 1.070s), but assuming a 75% attenuation, this should work out to around 6.7% ABV, which will be a solid IPA. Add in that citrusy, piney goodness from the Simcoe, and I’ll be a happy camper.

I did notice a lot of sediment in the wort, even after I strained it into the fermenter, which has me a bit worried, but what else can I do? I guess we’ll find out in a few weeks.

I’m going to try something new with this batch – dry hopping! I talked to the guy at the homebrew shop and he said I could do it in primary, so I figure I’ll wait a week or so (i.e. until fermentation ends), chuck in the last ounce of hops, give it another week, then rack to the bottling bucket and bottle the suckers. Exciting!

Not sure what my next batch will be. I’ve been toying with the idea of a Earl Grey beer – start with a british beer base (perhaps an ESB), then use some sort of bergamot oil for extra flavor. I have no idea if it will work, but I want to see how it turns out. It’ll probably be another small batch, so even if it’s bad, it won’t be a big deal. After that, I’ve been thinking about a Belgian dubbel for a while now, and I think it’ll be time…

Adventures in Brewing – Beer #6: Bottling

The Christmas beer was in the fermenter for two weeks, so it was bottling time. Fermentation started quickly, lots of bubbles in the airlock for about 4 days, after which, things trailed off quickly. The biggest question with this brew was the spices and damn, this smelled great. The cloves were probably the most prominent of the spices, but it seemed well matched to the rest of the beer. That being said, I wanted to get some more cinnamon out of this, so I chucked a few cinnamon sticks in the bottling bucket to give it some extra… cinnamonity? And the finished product did indeed seem to display a little more cinnamonitivity. My guess is that the spiciness will fade in time, so this will probably be nice and complex by Christmas.

Final gravity was 1.014, which was a hair lower than expected, but that’s a pleasant surprise. If my calculations are correct, this will bring the beer to around 6% ABV, which was my exact target. I gave it a taste, and it seems pretty good. I don’t really have a feel for how non-carbonated beer will taste once it’s carbonated, but this seems right. Nice spiciness, good body, seems like it will be good stuff. The appearance is a very pretty dark amber color.

My Christmas Ale, straight from the fermenter

There’s about 6 weeks before Christmas, which should give it enough time to condition in the bottle. My saison was awesome at week one, but that’s rare and in this case, I’m assuming the spices need some time to settle down. 6 weeks should do the trick.

Not sure what’s next. I’m saving the dubbel for the summer and since it’s winter, I’d like to make something that requires lower fermentation temperatures. An IPA (single hopped Simcoe?) or maybe a British ESB of some kind (my nutty idea is to get me some bergamot oil and make an Earl Grey British ale, maybe even using some tea in the initial steeping phase.) Funnily enough, a lot of Christmas beers say that they get better with age, so I might even want to make next year’s Christmas beer now, and age it. Or something. I was also thinking that it might be time to get a secondary fermenter, which would allow all sorts of fun stuff like dry hopping and oak aging (and bourbon oak aging!)

(Cross Posted on Kaedrin Weblog)

Adventures in Brewing – Beer #6: Spiced Christmas Ale

I really wanted to start this beer earlier, but due to a variety of factors1, I didn’t get to this until now. All I really knew is that I wanted a winter warmery type of beer, which is pretty damn vague. My local homebrew shop owner was very helpful, despite my lack of preparation here. We discussed a bit, talked about Anchor’s Christmas Ale (which, granted, changes every year), and eventually settled on a dark red ale with my choice of spices added at the end of the boil. I’m actually pretty happy with the recipe – it sounds really good. Now to find out if it will taste good!

Beer #6: Spiced Christmas Ale

November 5, 2011

1 lb. Crystal 40 (specialty grain)

2 oz. Roasted Barley (specialty grain)

3.3 lb. Golden Light LME

3 lb. Amber DME

1 lb. Golden Light DME

1 oz. Northern Brewer (Bittering @ 8.6% AA)

1 oz. Hallertau Hops (Flavor)

1 tsp Irish Moss

1 tsp Bitter Orange Peel

1/4 tsp Ground Nutmeg

1/4 tsp Coriander

2 Cinnamon Sticks

3 Whole Cloves

Wyeast 1056 – American Ale Yeast

Nothing super unusual here, though there are only two hop additions. The reason for this is that the aroma will be derived from spices rather than hops. Speaking of spices, I have no idea what I’m doing. Everything I’ve ever read about spices indicates that it’s very easy to overdo things. So I’m deliberately attempting to keep it down2. Looking around at some other recipes, I see people adding about 0.5 oz. (or more) of spices to beers, which works out to 3 tsp. I’m trying to do less than that (though it’s difficult to tell with cinnamon sticks/whole cloves, but I’m using slightly less than most recipes I’ve seen), which will hopefully leave me with some spicy goodness without overwhelming the beer.

Not wanting to go in completely blind, I tried making a couple cups of spice tea (i.e. hot water and spice) using two different spice mixtures. I completely overdid the Nutmeg, which overpowered the other spices, so I cut that down in the recipe. But otherwise, it smelled pretty great. Of course, this doesn’t even come close to approximating the final product I’m hoping for, but it seemed like a useful exercise. Alright, enough preamble, let’s get this party started!

Steeped the specialty grains in 150° F – 160° F water for around 20 minutes, drained, sparged with another half gallon of water, and put the lid on to bring the wort to a boil. Once there, added the 3 pounds of Amber DME, stirred like crazy for a while, brought it back to a boil and added the bittering hops. Here starts the clock. 30 minutes into the boil, added the rest of the DME and LME. This brought the boil to a standstill, so I took some extra time to get it back to boiling (which took 5-10 minutes). After another 10 minutes, I added the flavor hops. 5 more minutes, added the irish moss. With about 3 minutes left, I started adding the various spices, removing from heat just when I was finishing with the spices.

Moved the pot to the ice bath to cool it off, brought it down to about 90° F, strained the wort (removing most of the spice and hops) into the fermenter, topped off with about 2.5 gallons of water, mixed it up real good, and took a sample and hydrometer reading. The wort was still about 75° F, so I had to wait a bit to get the temperature down (I moved it out of the kitchen, which was pretty hot at this point, and it cooled off after about 25 minutes so that it was in the high 60s). Not sure if the extra time sitting out in the open will be good for it, but it was definitely too hot to finish. I pitched the yeast, put the top on the bucket and installed the airlock. The temperature in my closet is in the mid 60s, which is perfect for this. Done.

Original Gravity: 1.060. Assuming 75% attenuation, that should bring me down to 1.015 and about a 5.9% ABV. I’m actually hoping for slightly higher attenuation (and thus a dryer beer with slightly higher ABV), but either way, this should be pretty good.

So I’m looking at two weeks in the fermenter, then bottling, and at least 2-3 weeks bottle conditioning. This will bring me to early/mid December, which is just in time for some Holiday celebration. Indeed, it should be peaking right around Christmas and New Years (though it may peak later).

I don’t think I overdid it with the spices. I could clearly smell them in the finished product, but it didn’t seem overpowering. I guess we’ll see what happens after the fermentation. My guess is that it will become even less potent after the yeast has its way with the wort. Worst case scenario, if the spices aren’t coming through, I’ll throw a cinnamon stick in the bottling bucket to give it some extra oomph. But from what people say about these kinds of spices, I should be fine.

So there we have it. Not sure what’s next. I’ve wanted to make a Belgian dubbel since I started (about a year ago), but winter is not the time for that. I should really make something that requires lower fermentation temperatures. I’m thinking perhaps an Simcoe single-hop IPA (or mixed hop IPA).

1 – And by variety of factors, I mean that I was lazy.

2 – But then I found that I had some leftover bitter orange peel from my saison, so I added a tsp of that too. I still think I’m under most other recipes when it comes to spices…

(Cross Posted on Kaedrin Weblog)

Adventures in Brewing – Beer #5: Bottling

When I finished my latest homebrew attempt, a stout, I was a little worried that the yeast would have trouble getting started. I had activated the smack pack early in the day, and it did expand a bit, but not to the extent that my previous attempts had. Fortunately, I saw activity in the airlock within about 12 hours, which is better than I was expecting. Indeed, about a day and a half later, it was bubbling furiously. It may have been the most active I’ve ever seen the airlock. Of course, it cut out a couple days later, and by the Wednesday after brew day, it had slowed considerably. I probably could have bottled this a few days ago, but I waited for the weekend, just to be sure. So as hurricane Irene made it’s way up to my area, I was hunkered down inside, bottling my beer.

Final gravity was a little on the high side – around 1.019 or so (maybe a bit higher, adjusting for temperature). My target was around 1.017, so this was probably close enough and will probably contribute a fuller body, which might actually be a good thing here, as I prefer full bodied stouts. From the aroma and taste, it may be a bit more roasty than I was hoping for, but we’ll see how the bottle conditioning affects things. It tastes good, but extrapolating how it will taste after conditioning is something I haven’t really figured out just yet. That being said, I think the bitterness turned out quite well. I was a little worried that the small amount of hops wouldn’t be enough, but they either were, or the natural bitterness from the dark grains is also pitching in… Anyway, given the starting gravity of 1.062-1.063 or so, this should wind up at around 5.5-6% ABV. A little lower than my goal, but given the fuller body I’m expecting, I think it will work out fine.

The appearance was very nice indeed, though I’m really curious as to what the head will look like in the final product. Stouts usually have a relatively dark head, tan or light brown in color. But I’m wondering if my use of light DME as the base will lighten the color. From the picture, you can see a little of the head, and it does seem darker than normal. I guess we’ll find out. The color of the beer is a really nice dark brown color (almost black) with some lighter brown highlights. Holding up to the light, I can’t see through it at all, and the highlights are minimal.

Homebrewed Stout - after fermentation, before conditioning

When I bottled my saison, I tried one a week later, and it was fantastic, so I’ll probably be trying this next week, hopefully with similar results!

I think I’ll be going for a Belgian-style Abbey Dubbel for my next batch. It’s one of my favorite styles, so I’m going to need to make sure my recipe is good here. I found a nice clone recipe of St. Bernardus 8 that might provide a good base to work from. But given my schedule for the next couple months, I probably won’t get to brew again until October, so I’ve got time. Not sure what I’ll try after that. Perhaps an IPA of some kind. I should probably try to take advantage of the cooler temperatures inside the house during winter, which means I did things kinda backwards this past year (I brewed a Belgian tripel in winter – using a yeast that requires high temperatures, then I went and brewed this stout in summer, which requires lower temperatures). I may also be upgrading my equipment a little for these future batches. I think I’ve established that I really enjoy this little hobby, so some new toys are probably worthwhile…

(Cross Posted on Kaedrin Weblog)

Adventures in Brewing – Beer #5: Stout

So the past three beers I’ve brewed have been pale in color, and I was looking to do something a bit darker this time around. For one thing, dark beers are apparently more suitable for extract homebrew as the extract process naturally makes the malt a bit darker, and the fact that I’m doing a partial boil (I only really boil about 3-3.5 gallons of liquid, then add water later to make up the difference) also leads to a darker color. And after a summer of drinking hefeweizens, saisons, tripels, and other pale ales, I’m getting to be in the mood for something darker anyway. Stouts have never been one of my favorite styles, but I have to admit that certain variations on the style have really grown on me. One of the big advantages of doing homebrew is that you can make whatever you want, so I started trying to figure out how to make a stout that emphasized the chocolate and caramel flavors, rather than the one–dimensional roastiness that overpowers a lot of stouts. I didn’t want a really dry stout, nor did I want a super-strong imperial stout. Something in the middle, with a lot of body and caramel/chocolate sweetness, but not a ton of roastiness.

I toyed with the notion of a milk stout, but none of the homebrew kits I could find online were really doing it for me. So I started playing with some online recipe calculators, and came up with a (rather lame) recipe. I probably know a lot more about beer than your typical beer drinker, but when it comes to expert homebrewer stuff, I’m still somewhat of a newb. I was unsure of my recipe, so I figured I should just take it to the local homebrew shop and ask the friendly guys there what I should do. I’m not entirely convinced that the recipe we ended up creating is exactly what I want, but it feels like it will be good.

Brew #5 – Stout

August 13, 2011

0.5 lb. Roasted Barley (Specialty Grain)

0.75 lb. British Chocolate Malt (Specialty Grain)

0.25 lb. Belgian Special B (Specialty Grain)

0.5 lb American Crystal 120L (Specialty Grain)

7 lb. Light DME

1 oz. Target Hops (bittering @ 8.6% AA)

Wyeast 1284 – Irish Ale Yeast

If you’re in the know, the first thing you’ll notice is that the majority of the sugars in this beer consist of light dry malt extract. But stouts are supposed to be dark! Well, it turns out that you don’t need much in the way of dark, roasted malts to get that nice, dark brown/black color, and since the specialty grains were fresh (and just crushed), you can get a much better flavor out of that than you can by just selecting dark malt extracts. As such, I think this is the most complex (and largest) specialty grain bill I’ve brewed. And according to our calculations, it will indeed be very dark. The way brewers measure beer color is called the Standard Reference Method (SRM), and this beer should have an SRM of around 45 (anything above 30 is usually referred to as black).

The other thing that stands out about the recipe is the single, relatively-small hop addition. Most brews have a hop schedule consisting of three additions: one for bittering, one for taste, and one for aroma. But since I was looking to highlight the caramel, chocolate, and roasty flavors of my malts, those taste and aroma hops would only detract from the experience. As such, the homebrew shop guy recommended I go with a single hop addition at the beginning of the boil. I’m not entirely convinced that there’s enough bitterness in what I ended up with, but again, I’m looking to make something that is sweet, chocolately/caramelly, and a little roasty. This isnt’ meant to be a hop bomb like some imperial stouts (or American Black Ales, or whatever you call that style), so it makes sense that the hop presence would be a bit muted.

I steeped the specialty grains in approximately 2.5 gallons of water at around 150° F – 160° F for about 20 minutes. Sparged with some 150° F water, bringing the total volume of the pot up to a little more than 3 gallons. Let the grains drain out (careful not to squeeze the grain bag), observed the black-as-night color of the wort and the various aromas it gave off. This may end up being a bit roastier than I expected, but nothing I could do about it at that point, so I punched up the stovetop to bring the mixture to a boil. Once at the boil, added the 7 pounds of DME and the hops and boy did it create a lot of bubbly head (Not sure exactly if you would call this head, but there was a bubbly head-like substance at the top of the pot, and it took some supervision to make sure it didn’t boil over). Settled in for the 60 minute boil. Once complete, I moved the pot to the ice bath in my sink. Unlike previous attempts, I came prepared with lots of ice this time, and that certainly helped cool the word down quicker… until all the ice melted. Still, it got down to around 100° F quicker than any of my previous attempts. At this point, I strained the wort into my fermenter and topped it all off with cold water, bringing the temperature down to around 75° F. Just a hint too hot, so I let it sit for a while (once I hit the cooling phase, I cranked the air conditioner, hoping to help with the cooling process), took my hydrometer reading, and pitched the yeast.

If I got one thing right with my initial recipe, it was the yeast choice (or at least, my yeast choice was exactly what the homebrew store guy said I should use). Apparently Irish Ale Yeast is really well matched with dark malts. So before I even started brewing, I had activated the wyeast smack-pack. It was dated 5/16/11, which is still somewhat recent, but unlike previous smack-packs, it didn’t swell up right away and took some cajoling to get it to swell at all. About 4 hours after the initial smack, it seemed to be swelling a bit, but I’m not sure if this yeast was really ready. This represents my greatest fear in this batch – the yeast seems to be a bit old and tired. Now, the Wyeast package says that the swelling need not be extreme for the yeast to be ok, but I’m still a bit worried (note to self – learn how to make a yeast starter so that I can avoid such anxiety). I pitched it at around 70° F, so I guess we’ll see how it does.

Original Gravity: 1.062 (approximate). Adjusting for temperature, maybe a tad higher. Either way, this is a little lower than my recipe implied (somewhere around 1.067), but still within the realm of what I wanted to make. Assuming solid attenuation, I’m looking at an ABV of around 6-6.5%, maybe higher.

My last batch turned out really well (I should probably review it at some point), so I’ve got high hopes for this. Even if it comes out a little roastier than expected, I’ll be happy. I am a bit worried about the yeast, but I saw some activity in the airlock this morning, so that’s promising. And besides, I worried a lot about the last batch, and it turned out great (first batch I’ve made that I really love).

Not sure what’s up next. I think I’ll want to get the Belgian Dubbel underway, so that I have it ready for the Holidays. After that, who knows? I was thinking about an IPA of some kind, but there are definite issues with hop utilization in extract boils, so maybe I’ll hold off on that a bit. I probably won’t be able to get to the next batch until October anyway, so I’ve got some time.

(Cross posted on Kaedrin Weblog)

Adventures in Brewing – Beer #4: Bottling

When I put my most recent homebrew, a saison style beer, in the fermenter, I started seeing bubbles in the airlock after only a few hours – a much quicker start than any of my previous brews. Indeed, this thing fermented vigorously for nearly 5 days. With all my previous attempts, bubbles didn’t appear in the airlock until at least 12-24 hours after pitching the yeast, and once they had started, there was only 2-3 days of vigorous activity, after which things trail off. Usually by the end of 2 weeks, things have slowed down considerably. And that happened for the saison too, but I was surprised at how long that initial phase of activity lasted. Now, I’m not entirely sure what this means, but I suspect that perhaps my pitching/fermentation temperature was a bit high, leading to a more active fermentation than is normally desired.

Or I could be completely wrong. The beer seemed to come out ok. It smells wonderful. It looks a little darker than usual for the style, but that’s kinda expected for extract brewing. I took a quick swig of it, and at first glance it seems to share a certain character with the Hefeweizen I brewed on my last attempt. Here’s to hoping that this goes a little better than my last attempt.

The final gravity was really low though. Somewhere around 1.005 (target was more around the 1.010 area), maybe even less. I guess we’ll see how that plays out. Doing the calculations, this means the beer should be somewhere around 7-7.5% ABV, which is certainly higher than I was shooting for, but not outside the realms of possibility.

I won’t bore you with the details of the bottling process, which basically went the same as usual – it’s a semi-tedious process, but the only really bad part is the sanitization of the bottles. Otherwise all went well and this stuff should be ready to drink in a few weeks. Wish me luck.

At this point, I’m looking to try something a little darker for my next batch. That’s apparently more suitable for extract brewing, and besides, my last 3 batches have been lighter style beers. Also, since I’ve been doing so much in the way of belgian styles, I figured I should try something different. Perhaps a chocolate stout or maybe an American Black Ale (or whatever you call those things).

(Cross Posted at Kaedrin Weblog)