Adventures in Brewing – Beer #4: Saison

Last time, I mentioned how my next batch of homebrew would probably be a saison style beer. I’ve been drinking a lot of saisons lately, and it’s quite a broad style. What I wanted to go for was something along the lines of Saison Dupont, but in looking around at the various homebrew kits out there, I didn’t see anything that really came close. So I picked up a book called Clone Brews, which has a recipe for a Saison Dupont clone (amongst many others). I ended up finding a Northern Brewer kit that was for a really weak, session strength saison that had enough similarities that I could buy that, then augment it with some additional ingredients. The recipe used below is a sorta hybrid between the recipe from the book and the Northern Brewer kit.

Brew #4 – Saison

June 19, 2011

0.5 lb. Belgian CaraVienne (specialty grain)

3.15 lb. Northern Brewer Pilsen LME

3 lb. Muntons Extra Light DME

1 lb. Briess Pilsen DME

1 lb. Light Belgian Candi Sugar

2 oz. Styrian Goldings hops (bittering @ 4.6% AA)

0.5 oz. East Kent Goldings hops (flavor)

0.5 oz. East Kent Goldings hops (aroma)

0.5 oz. Saaz hops (aroma)

0.5 oz. Bitter Orange Peel

1 tsp. Irish Moss

Wyeast 3711 French Saison Yeast

To make sure I wasn’t throwing the recipe completely out of whack by adding extra malt/hops/whatever, I played around on Hopville’s Beer Calculus thingymabob. It turns out that I was a little low on bittering hops, but I had enough other hops left over that I was able to adjust the recipe just fine (part of the problem is that the packaging for the Styrian Goldings hops says they’re 4.6% Alpha Acids, while the recipe from the book has them at 5% – so by adding extra, I probably screwed it up and made myself a very bitter saison). I did save the recipe in case you want to see some more stats on it. Note that they let me add this – which basically tells me to take most of the recipes on there with a grain of salt! Also, I had to use “Munton’s Light DME” instead of “Extra Light”, which I presume inflated the OG a bit.

Anyway, my last batch turned out kinda weird. It tastes ok, but it’s also not much like a Hefeweizen. It may continue to work itself out in the bottles, but basically, the light wheat flavors one expects out of a Hefeweizen are nowhere to be found. I think one of the big problems was that I used too little water when I did the boil, thus leading to a bit of caramelization of the malt, which kinda destroyed the delicate wheat flavors. There are probably some other process things I can improve as well. This saison recipe is a little more complicated than the last one, but it’s not particularly difficult either.

So I start with steeping the Belgian CaraVienne grains in 2 gallons (or so) of 150°-170° water for around 20 minutes (surprisingly, the temperature was rising quickly, so it was probably a bit less than 20 minutes). I’ve never done this before, but I slowly removed the grains, put them in a strainer, and sparged with another half gallon of hot (not boiling) water. At this point, I removed from heat, then added the malt extracts and candi sugar, stirring vigorously to make sure the candi dissolved in the water before putting it back on the heat (again, don’t want to caramelize the sugars – this is supposed to be a light colored beer). At this point, I estimated about 3.5 gallons of liquid in the pot, maybe even more.

Settled in for the long wait for it to boil. I put the lid on the wort to start, but I made sure to remove it once it got to boiling temperatures. One of the things I may have done wrong on my last batch was to keep the pot partially covered for most of the boil. This helped me maintain a good boil, but apparently during the boiling process, bad chemicals are released in the steam, and if you’re covering the pot, some of it can’t escape and you get off flavors in your beer. So despite my pitifully weak electric range, I tried keeping it uncovered for the whole boil. It actually wasn’t that bad – perhaps the summer climate is more conducive to brewing…

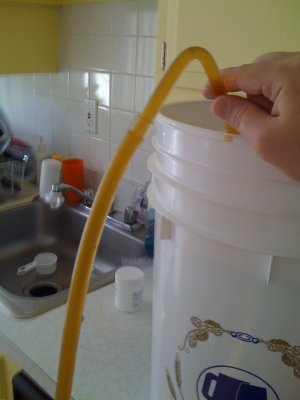
Once it got to boiling, I added the bittering hops and started the timer. 45 minutes later, added flavor hops, bitter orange peel, and Irish Moss. 10 minutes after that, added the aroma hops (I had some extra Saaz hops from the kit, so I made a last minute audible and added an additional 0.5 oz. of hops for aroma). 5 minutes later, and it was off to the ice bath, which continues to be a challenge. Got it down to a reasonable 110° or so, and strained the wort into my fermenting bucket, pausing to clear out my strainer several times (all those hops were clogging it up). It filled up about 2.5 gallons of the fermenter, meaning that I had boiled off at least one gallon. Filled the rest of the bucket up with cold water, bringing the temperature down further (maybe a little more than 70°). Stirred vigorously to aerate the wort.

I mentioned last time that I was struggling with the yeast for the saison. If I really wanted to make a true Saison Dupont clone, I would have used the Wyeast 3724 Belgian Saison yeast, which, rumor has it, is based on Dupont’s house yeast. However, it’s also infamous for getting stuck at around 1.035 during fermentation, unless you maintain really high temperatures (like, upwards of 85°). Given that my brewing skills are still fledgling and that my ability to control temperature is lacking, I decided that I should try something else. At first, I was looking at a bunch of Abbey and Trappist yeasts, but then I found the Wyeast 3711 French Saison yeast. Near as I can tell, it will give me a similar feel, but without the trickiness of the 3724 variety. I had smacked the Wyeast packet early this morning (couple hours before starting the boil) and it had swelled up as the yeast became active. After all was ready, I pitched the yeast, threw the cap on, and installed the airlock. Done!

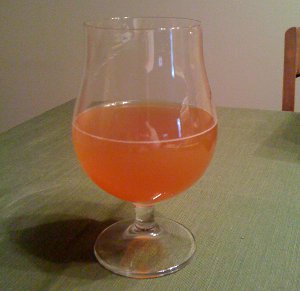
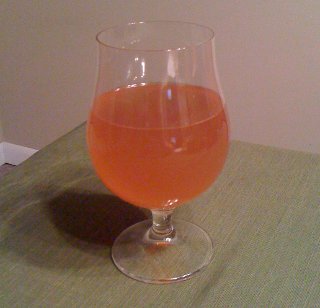
Original Gravity: 1.060 (approximate). This is a bit low according to my calculations, but adjusting for temperature and imprecision at reading the hydrometer, you can maybe fudge that up to 1.062. Assuming reasonable attenuation, this should result in an ABV of around 6.5%-7%, which is right around where I was aiming. Hopefully it won’t be overwhelmed by hoppiness…

Timewise, it took about 3-3.5 hours (including the cleanup), which is about average. I’m a little bit worried about temperature control here, but I should be able to keep it at around 70°-75°, which is towards the upper range of the yeast’s comfort zone, but I’m hoping that will be ok. There are some doubts about this batch though. Between the extra hops and the temperature and how my last batch turned out, I’m not sure it will turn out well. But then I did correct some things about my process, so hopefully this will make up for any problems.

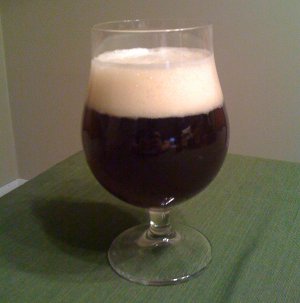
My next batch will probably be something a bit darker. Apparently these are a bit easier to brew for extract brewing. Perhaps a Belgian Style Dubbel. Or maybe just something a little more amber, like an IPA or something.

(Cross Posted on Kaedrin Weblog)

Adventures in Brewing – Beer #3: Bottling

After two weeks in the fermenter, I went ahead and bottled the Bavarian Hefeweizen yesterday. I probably could have bottled it a few days ago, but I decided to give it a little more time, especially since I don’t really do secondary fermentation – that’s a process where I would transfer the beer from the primary fermenter to a secondary, separating it from the majority of the yeast and giving it a chance to condition and clear. However, I only really have one fermenting bucket, and besides, transferring the beer opens it up to the air and the possibility of infection (by wild yeast strains, bacteria, etc…) I’m pretty good about sanitation, but still, the less chances for mistakes the better. Also, Hefeweizens are supposed to be cloudy – the name itself literally translates to “yeast wheat”, or “wheat beer with yeast”. The question of whether or not to use secondary fermentation seems to be a pretty contentious one, but for simplicity’s sake, I’m going to stick with only using the primary for now.

The final gravity was 1.010. For some reason, Northern Brewer never mentions target gravity for any of their kits. Nevertheless, for a beer with a starting gravity of ~1.050, that final gravity was appropriate. My previous two batches came in a little lower than I was expecting, but this one was just what I was hoping for (in monitoring temperatures, it seems that conditions were ideal for this batch). Doing the math on this, I find that this will be a 5.25% ABV beer, which is just about perfect for the style.

As with my previous two attempts, the bottling process went smoothly. I did invest in an auto-siphon this time around, and yes, it was worth every penny. Not that getting a siphon to work was particularly difficult, just that it was a huge pain in the ass to get going. The auto-siphon makes that process very easy. Otherwise, nothing new to report – sanitizing bottles is a tedious chore, filling and capping the bottles is a little more fun, but also tedious and repetitive. I ended up just shy of two full cases of beer.

Like last time, the beer looked and smelled fantastic. It’s a little brighter than I expected, but I expect it to darken up a bit as it conditions in the bottles (about 3-4 weeks after bottling the tripel, the color was significantly changed). The smell was really wonderful – all due to the yeast I used. It’s a German yeast, but it has very distinct characteristics that I usually associate with Belgian yeasts. I really can’t wait to try this beer!

Homebrew 3

If all goes well, this should be ready to drink in 1-2 weeks (definitely in time for my next beer club meeting)… Indeed, it should be reaching full maturity right as summer is hitting, which is perfect. That pretty much covers it for this beer, and I’m already attempting to work out a recipe for my next beer. I’m looking to make a Belgian style Saison (in the mold of Saison Dupont or Ommegang Hennepin). Most of the kits I’ve found haven’t quite met my expectations, so I might actually have to try my hand at a more free-form recipe. In particular, I’m a little worried about what yeast to use. My understanding is that some saison yeasts require high temperatures (in the 80°F – 90°F range) and will often putter out early if conditions aren’t just right. As such, I may end up using some sort of alternative, as I have little control over temperature (interestingly, the temp for the Hefeweizen was just about perfect).

(Cross Posted on Kaedrin Weblog)

Adventures in Brewing – Beer #3: A Wheat Beer for Summer

I had wanted to start this batch a little earlier, but compared to my first two attempts, this one is actually a lot simpler and should take less time to mature. It’s a wheat beer (a Bavarian Hefeweizen to be exact), which is generally light and refreshing – a perfect beer for summer. Since I brewed this yesterday, it will take about a month for this to be ready to drink, which will be right around June, just in time for summer.

My last attempt was a Belgian style Tripel. It was a relatively ambitious attempt, but it came out reasonably well. I like it better than my first homebrew, though it’s clearly not a perfect beer. Still, it was quite encouraging. This time around, I went with a kit from Northern Brewer and was surprised to learn how much simpler the Hefeweizen is to brew. No specialty grains and only one hop addition means that the time between each step is relatively long, letting me get some other stuff done while waiting to finish the boil (or whatever).

Brew #3 – Bavarian Hefeweizen

April 30, 2011

6 lb. Wheat LME

1 lb. Wheat DME

1 oz. Tettnang hops (bittering)

Wyeast 3068 Weihenstephan Wheat Yeast

As you can tell from the relatively small recipe (compare that to the recipe for the tripel), there’s not much to this one, and the process really was a lot simpler. This was, however, the first time I’ve ever used one of Wyeast’s “Smack Packs”, which come in a little packet containing yeast and a sealed nutrient packet. A few hours before you’re ready to brew, you “smack” the nutrient packet, which gets the yeast started. It’s a little weird, and I wasn’t sure if I did it right at first, but after about a half hour or so, I could actually hear the yeast going, and about an hour later, the packet was starting to swell (which is how it’s supposed to work). Comfortable that my yeast would be ready to pitch once I finished, I started the process proper.

Brought 2 gallons of tap water to a boil, after which I removed from heat and added the liquid and dry malt extracts (incidentally, I’ve heard that it’s better to rehydrate the DME separately, though I’ve never done that – perhaps next time I use DME), stirring carefully. Put it back on the heat and returned it to a boil. Added the hops, stirring carefully to avoid any overflow, started my timer, then sat down with my book and read for about 50 minutes, stopping only once or twice to check on the boiling wort, stirring occasionally. I prepared my ice bath and started sanitizing the rest of the equipment. When the 60 minute mark was reached, I added the pot to my ice bath. This continues to be a bit of a challenge, but the temperature dropped quick enough. Once it was at about 100° F, I took it out of the bath and poured through a strainer into the fermenter. Topped off the fermenter with enough cold water to bring it down to about 68° F, which was just about perfect according to my yeast package. Pitched the yeast, sealed up the fermenter, and installed the airlock.

I was surprised that I could really smell the yeasty character while pitching, though it makes sense, given that the nutrient packet had already gotten the yeast started. Previous attempts were using dry yeast (which would have no odor) and a vial of White Labs yeast, which was more concentrated (though probably around the same volume as the Wyeast packet, it didn’t have the whole nutrient pack to get things started). Temperature in my closet seems to be a pretty steady 70° F, which is about exactly what I was looking for. I just checked the fermenter, and the airlock is bubbling away happily.

Original Gravity: 1.048-1.050 (approximate). The recipe called for 1.049, so I’m almost dead on there. Strangely, the Northern Brewer site/directions make no mention of the expected Final Gravity (not that it really matters, fermentation ends when it ends).

Though the process was easier, I didn’t really cut much time off of the session. It came in at around 2-2.5 hours, which isn’t bad at all. The real advantage of the simple process was that there was enough unbroken periods of time that I could get other stuff done while waiting. The really time consuming part continues to be getting the pot to a boil. This is probably because I’m on a electric stove. Well, now that it’s warmer out, I may be able to invest in some outdoor equipment, which might make things easier.

I’m already working on the recipe for my next beer, which will probably be a saison in the style of the excellent Saison Dupont, one of my favorite beers and another crisp and refreshing beer for summer. The recipe won’t be an exact clone, as my understanding is that the Wyeast version of Dupont’s yeast is infamously finicky with regard to temperatures (which is the part of the process I’m least able to control at this point). So unless global warming hits with a vengeance in late-May/early-June, I’ll probably end up using the Wyeast 1214 Abbey Ale.

(Cross posted at Kaedrin Weblog)

April Beer Club

Every month, a bunch of friends and I get together at a local BYOB and drink lots of beer. I seem to have run out of beer puns for this month, but there was no shortage of beer at tonight’s gathering (despite only 7 attendees):

April Beer Club

(Click for bigger image)

No real theme this month, but lots of new beers, along with some new ones. Not all of the pictured beers were cracked open, but most of them were (I believe only 4 left unopened, though there was still some beer left in a couple bottles). For reference, here’s what I tried:

  • Sea Dog Wild Blueberry Wheat Ale – Intense blueberry aromas and very fruity taste. Overwhelmingly blueberry. Not bad, but not especially accomplished either. C+
  • Unibroue Éphémère – Again, an intense sour apple aroma and flavor, this one is much better balanced and an interesting beer. I’ve actually had this a few times before, and it’s something I’ve always enjoyed, even if it’s not my favorite of Unibroue’s offerings. Everyone seemed to enjoy it though, and it’s probably a good gateway craft beer. B
  • Southampton Biere De Mars – A very nice looking beer, with a nice spicy aroma and a flavor that is quite unusual, but still drinkable. The consensus among attendees was somewhat mixed, but I enjoyed it, even if it’s not exactly a favorite. There’s a flavor there that I couldn’t quite place, but which made this a rather unique tasting beer. Fellow beer club members had a similar feeling. I’ll give it a tentative B
  • Ommegang Rare Vos – One of my all time favorites, I’ve actually got a bottle of this in the fridge, so expect a full review… at some point. A great beer though, and very popular with the beer club crowd, even with the non-beer nerds.
  • Victory Prima Pils – I have had many of these over the years, and it’s one of those beers that tastes very different out of the bottle than it does on tap. And honestly, I think I prefer the bottled version. For a pilsner style beer, it’s extremely hoppy, but I rather like that distinction. Well worth a try, and probably something I’ll give a more thorough review to later. For now, I’ll leave it as a B+
  • Oskar Blues Gordon Imperial Red Ale (aka G’Knight) – One of my contributions for the night, and a solid DIPA. Expect a full review at some point in the near future. Beer club crowd seemed to enjoy it, despite it’s hoppy nature.
  • Peak Organic Simcoe Spring Ale – It’s got that pine resin aroma and flavor from the Simcoe hops, but it’s otherwise a pretty standard IPA. Not particularly popular with the overall beer club crowd, but it’s solid, if nothing special. B
  • Long Trail Pollenator – Holy shit, is this a terrible beer. And of course, I ended up taking more of this than most other brews. I immediately regretted the decision. Tasted like skunked piss. My first F since starting the blog.
  • Oscar Blues Ten Fidy – A very roasty 10.5% stout. I enjoyed it, but those who don’t typically go in for stouts didn’t seem to care for it. Not to get all sexist or anything, but all the guys seemed to enjoy it, while the females seemed to dislike. I have a couple more of these, so expect a full review at some point in the indeterminate future.
  • Leinenkugel’s Summer Shandy – Smells and tastes of a sorta carbonated lemonade. Very little beer flavor and I really did not enjoy, though some of the more girly beer club members seemed to like it. D
  • Blue Point Spring Fling – A very average pale ale. Not bad, but absolutely nothing special about it. Profoundly average beer. C
  • My Homebrew Tripel – I brought a nice 22 oz bottle of my tripel, which has really undergone a transformation since bottling. I’ve been trying about one bottle per week since I bottled, and it’s gone from an overly-sweet and under-carbonated beer to something much more drinkable. It used to be a very bright orange color, but it has since matured into a more appropriate lightish brown color. The taste is still a little too sweet and too alcoholly, but it’s still a pretty good attempt, and I have a feeling it will mellow out with more time. Expect a more thorough review of this homebrew at some point. If nothing else, I do believe it came out better than my first attempt. This was one of the first beers we opened though, and someone did mention that it could have been a bit of a palate-killer because it’s so intense (but luckily most people only took a small sample). It certainly was a strong beer – more than one person commented that they got the sorta wine-flush feeling from the alchohol. So far, I’m pretty happy with this beer, and I think it’s only been getting better with time.
  • Dana’s Maibock Homebrew – Fantastic homebrew brewed by my friend Dana from a Mr. Beer specialty kit. Very sweet with a nice tang in the finish that I couldn’t quite place. Still, very enjoyable beer, maybe my favorite from Dana’s homebrewing efforts. Most of the Mr. Beer stuff is pretty average (and Dana also brought a Red Ale which was pretty normal stuff), but their specialty kits seem to produce some really good beers, and this one is a prime example (I also rather enjoyed Dana’s specialty Tripel from a while back). We made a deal to trade some of my tripel with some of her maibock. Excellent stuff

So yeah, I suppose you could take the ratings above with a grain of salt (as conditions were not optimal for tasting), but I think the ones I actually rated are pretty accurate. And several of the others will be reviewed on this blog in the near future. It may seem like the above are pretty low, and there were definitely a couple of real stinkers, but some of the ones I didn’t provide a rating for will most likely come in to the B to A range, so there were definitely some great beers that were available tonight…

All in all, another successful outing for the beer club. I was surprised at the amount of beer that we ended up getting through, even if we did leave some of the beers pictured above unopened (though I will say that the only unopened beer that I’ve never had before was the Breckenridge Vanilla Porter). As always, I’m already looking forward to next month!

Adventures in Brewing – Beer #2: The Bottling

After three weeks in the fermenter, I’ve finally managed to bottle my Belgian Style Tripel. Since this was a high-gravity beer, it required additional time in the fermenter and will most likely take a while to condition in the bottles as well. I’m hoping to check it out in about 3 weeks, just to see how it’s doing.

The Final Gravity ended up being somewhere around 1.015 (maybe a little less). The more I use a hydrometer, the less confident I am in the measurements. I got somewhat inconsistent readings. Nevertheless, it was definitely lower than the recipe’s goal of 1.020. My last beer also ended up lower than the recommended FG, so perhaps I should bottle a little earlier in the process. If my math is correct, this yields a beer that is somewhere in the 9-10% ABV range, which is right in the middle of the proper range for Belgian style tripels. The recipe I was using was meant to imitate Westmalle Tripel, which is 9.5%, so I’m definitely in the right neighborhood.

If I make some extreme assumptions about my hydrometer readings for both the OG and FG, the highest it could come out is around 10.5% ABV, which would be a little high for the style, but still within the general range of acceptable ABV.

The process went smoothly, just like last time. No problems racking the beer from the fermenter to the bottling bucket. Sanitizing the bottles is tedious and repetitive, but easy enough. I was hoping to be able to use some 750 ml bottles I’d harvested from recent drinking, but it turns out that the caps I have don’t fit on those bottles, which are slightly larger than the standard bottlecap. I had plenty of regular bottles, and even some 22 oz bombers that worked, so no real problem there, I just had to sanitize more bottles than I realized. Filling the bottles was kinda fun though, even if it’s also tedious and repetitive. Something about using the bottling wand is just great fun.

The beer itself looked and smelled great. The aroma was maybe a bit boozy (I was sorta expecting that given the high ABV), but it still had that distinct Belgian yeast smell that I love so much. Once the bottles condition and the priming sugar does its thing, there should be plenty of carbonation to cut the alcohol though, so I still have high hopes for this one. I poured some in a glass and it looked great. Whilst brewing and looking at it in the buckets, it seemed a lot darker than your typical tripel, but when I poured a glass of it, it looked fantastic. The picture below actually looks a little more orange where I remember it being a little more brown, but I guess we’ll see what it looks like when it finishes conditioning (obviously, since it’s now bottle conditioning, there’s no carbonation and thus no head in the picture):

Homebrew 2

So that just about finishes up this batch. I’m already looking into a new batch of beer, though I’m torn about what style to go for next. If I brew again in the next few weeks, I could probably have something that’s ready to drink right in time for summer. So I was thinking of trying my hand at a wheat beer (perhaps a Hefeweizen) or a Saison. Both tend to be lighter and more refreshing beers, so they’re perfect for summer. Right now, I’m leaning towards the wheat beer because Saison is another Belgian style and I just finished something along those lines. Of course, I could end up brewing both (one for early summer, one for later summer), which would leave time for a fall batch (perhaps an IPA of some kind) and a winter batch (I was think a Belgian dubbel, perhaps with some added holiday spices).

(Cross posted on Kaedrin Weblog)

Adventures in Brewing – Beer #2: Electric Boogaloo

I learned a lot during the course of my first homebrew attempt a few months ago, and after the hectic holiday season and beginning of the year, I resolved to put my learnings into practice this weekend. My first homebrew was a straightforward English Brown Ale. I don’t think there was anything wrong with the beer, and it’s certainly drinkable, but it’s also a bit too simple and the taste ends up a bit thin. Again, not bad, but not very complex or interesting either. But then, that was kinda the plan. It was my first beer, so I wasn’t expecting much out of it.

But I wanted to try something a little more ambitious for my second attempt and after browsing the recipes at High Gravity, I settled on a Belgian Style Tripel – one modeled after the Trappist Westmalle Tripel (one of my favorite beers).

Brew #2 – Belgian Style Tripel

February 13, 2011

10.5 lb. Montons Light LME

2 lb. Weyermann Pilsner Malt (grains)

4 oz. Melanoidin (grains)

1 lb. Belgian Light Candi Sugar

1.5 oz. Styrian Goldings pellet hops (bittering)

0.25 oz. Hallertau Herbrucker hops (flavor)

0.25 oz. Tettnanger German hops (flavor)

0.5 oz. Czech Saaz pellet hops (Finishing)

1 tsp. Irish Moss

White Labs Trappist Ale Yeast WLP500

Steeped Weyermann Pilsner Malt and Melanoidin in about 2.5 gallons filtered tap water at around 150°F for 20 minutes. Unlike last time, I started this batch with warm water, which saved a bunch of time in getting to 150°F (also, I wasn’t afraid to crank the stovetop to it’s highest setting). Removed grain bag slowly, letting letting whatever water was left in there drain out. Per instructions, I added a little more water, removed from heat, and added about half of the Light LME and all of the candi sugar. I stirred vigorously, as I was afraid the candi sugar would stick to the bottom. After a few minutes, all appeared well, at which point I threw it back on high heat, eventually bringing to a boil (in the future, I need to figure out a better way to do this – my stovetop is clearly not up to the challenge – it took around 45 minutes to bring the mixture to a boil). The ingredient kit I bought came with another muslin bag (i.e. a thin netting) for hops, so I put the hops in the bag, then put the bag in the boiling wort. Kept at a small rolling boil for 45 minutes, stirring occasionally to make sure the hops didn’t just float to one side of the pot. Added flavoring hops. Directions say to add to existing hop bag, but I just threw them in directly, along with the Irish Moss. 10 minutes of that, and I added the remaining LME. I also threw in the finishing hops, and removed from heat. A few minutes later, I removed the hop bag and placed pot in my sink (which was filled with some cold water and some ice) to quickly cool. I was a little more prepared with ice this time, but cooling the wort continues to be a bit of an issue. Got the wort down to manageable temperature and poured it into my fermentation bucket (attempting to remove sediment with a controlled pour through a sanitized strainer). Added some extra water to the bucket to bring up the 5 gallon mark, pouring from high up to aerate the wort. Stirred things around some more, again attempting to aerate the wort, and took an original gravity reading. For such a high OG, I probably should have done a yeast starter, but I didn’t have any extra DME laying around, so I figured I could just use the yeast as packaged. The packaging says the yeast is best before April 15, 2011, so I’m definitely ok there, though I’m not sure when the yeast was packaged in the first place. Pitched yeast, stirred a bit, threw the cap on, and installed the airlock. Done!

Original Gravity: 1.085 (approximate). This is a little less than what the recipe says (1.088), but I also have a hard time reading the hydrometer, so I’m guessing it’s good enough for the start.

Well, it looks like I cut off about 30-60 minutes from the process – it only took about 2.5-3 hours this time. Plus, I was a little more comfortable walking away from the stove and doing other stuff while (for example) the boil started, so it wasn’t quite as draining of an experience. The only thing I’m worried about now is keeping the temperature of the fermenting wort at around 70°F (this is apparently the temperature at which the yeast works best). My house tends to be in the mid 60°s F during the winter though, so maybe I’ll need to break out the space heater and make sure my closet is at a better temperature or something.

I’m already planning out my next batch, which If I start a couple weeks after I bottle this batch, should put me in a good timeframe to consider a summer brew. Perhaps a Saison or a wheat beer….

Update 3/6/11: Bottled!

(Cross Posted at Kaedrin Weblog)

Adventures in Brewing – Part 3: The Tasting

This is actually quite long overdue. I’ve already drank (or given away) more than a full case of my first attempt at homebrewing: an English Brown Ale. The general consensus is that it’s pretty good! Or it’s at least good enough that my friends don’t feel the need to insult me. As for my own feelings, I think it was a fine first attempt, but I almost wish I had started with something a little more ambitious. Still, there’s something really satisfying about enjoying the fruits of your own labor. I mean, I turned water into beer! How awesome is that? Here it is:

Homebrew #1

It’s hard to tell from the picture, but it pours a nice dark brown color, with some shades of amber, especially when you hold it up to the light. Solid sized head, but only minor lacing as I drink. Smells fantastic. It’s got a really sweet and bready smell. Taste starts off well enough. A little sweetness up front and the finish is actually rather dry. Unfortunately, it tastes a little thin to me. This is fine at the start of the glass (I think it makes a good first impression), but it’s not as satisfying as you near the end. There’s definitely no complexity at all in the taste… but then, there don’t appear to be any off flavors either. Also, I was brewing from a rather ordinary kit recipe that wasn’t really attempting any complexity, so there’s that. All in all, I think it’s probably a step up from the typical macro light lager, but it’s not going to light the world on fire either. I’ll give it a C+, which I think is probably fair.

Beer Nerd Details: 4.5% ABV bottled (12 oz). Drank from a tulip glass.

I’m pretty happy with my first attempt here, but it’s clear that there’s a lot of room for improvement. I learned a lot in my first attempt though, and I’m confident that my next beer will at least be more interesting, if not exactly perfect…

Adventures in Brewing – Part 2: The Bottling

A couple of weeks ago, I started brewing an English Brown Ale. After two weeks in the fermenter, I went ahead and bottled the beer this weekend. Just another couple of weeks in the bottle to condition, and they should be ready to go (supposedly, the impatient can try it after a week, which I might have to do, just to see what it’s like and how it ages).

The final gravity ended up at around 1.008, so if my calculations (and my hydrometer readings, which are probably more approximate than I’d like) are correct, this should yield something around 4.5% alcohol. Both my hydrometer readings were a bit low according to the worksheet/recipe I was using, but that ABV is right in the middle of the range. I suspect this means there won’t be as much sugar in the beer and thus the taste will be a bit less powerful, but I guess we’ll find out.

I ended up with a little more than a case and a half of bottled beer, which is probably a bit low. I was definitely overcautious about racking the beer to my bottling bucket. Not wanting to transfer any yeast and never having done it before, I was a little too conservative in stopping the siphoning process (which was a lot easier and faster than I was expecting – just add the priming sugar and get the siphon started and it only took a few minutes to transfer the grand majority of the beer to the bottling bucket). Next time I should be able to get around two full cases out of a 5 gallon batch.

Once in the bottling bucket, the process went pretty smoothly, and I actually found filling the bottles up and capping them to be pretty fun (the bottling wand seems like a life saver – I’d hate to do this with just a tube). Once I got towards the bottom of the bucket, it was a bit of a challenge to get as much out of there as possible without oxidizing the beer too much. I managed to get myself a quick cup of the beer and took a few sips. Of course, it was room temperature and not carbonated enough (carbonation happens in the bottle, thanks to the priming sugar), but it sure was beer. I didn’t detect anything “off” about the taste, and it smelled pretty good too. Maybe I managed to not screw it up!

Beer Siphon

Siphoning the beer

The worst part of the process was really the sanitation piece. Washing and scrubbing two cases of beer bottles, then getting them to dry out (as much as I could – I’m sure some still had some water in them when I was bottling, which is probably bad) was a huge, tedious pain in the butt. That was probably the most time consuming portion of the process. The actual bottling/capping probably took the same amount of time, but that was more fun. It probably took a little over 2 hours in total, which actually wasn’t that bad. In the end, I’m pretty happy with my first experience in brewing. Even if the beer turns out terrible or bland, I feel like I’ve learned a lot and will undoubtedly have an easier time of it in the next round. Speaking of which, I’m looking to put together a recipe for a Belgian Style Tripel. This will be a higher gravity beer and probably take longer to brew, but it’s one of my favorite styles and it’s apparently not that difficult either.

(Cross posted at the Kaedrin Weblog)

Adventures in Brewing – Part 1

Well, I’ve made the leap into the realm of homebrewing. I’ve noticed lately that while I do participate in a number of creative activities, most of what I end up creating is virtual (i.e. it’s all done on the computer). There isn’t anything wrong with that, of course, but I’ve been itching to make something out here in meatspace, and brewing beer should help me scratch that itch.

I stopped by a local brewshop yesterday and picked up a brewing kit, complete with a Brewer’s Best English Brown Ale ingredient kit (which should make something akin to a Newcastle Brown Ale). A Trappist brew master, I am not, but it seems like a good place to start (a step ahead of the venerable Mr. Beer, but far below the all-grain brewers). My first brewing attempt is tonight, so wish me luck. Beer nerd details are below, and I’ll post an update after I’ve finished.

Brew #1: English Brown Ale

November 7, 2010

3.3 lb. Amber liquid malt extract

2 lb. Amber dried malt extract

8 oz. Caramel 60L malt grains

4 oz. Chocolate malt grains

6 oz. Crushed Carapils malt grains

1 oz. Willamette Bittering Hops

1 oz. Willamette Flavoring Hops

0.25 oz. Willamette Aroma Hops

Steeped grains in about 2.5 gallons filtered tap water at around 150°F for 20 minutes (some of the thinner grains filtered out of the bag before even putting it in the pot – is that bad? I just poured the debris into the pot too…). Removed grain bag slowly, letting whatever water was left in there drain out. Brought wort to a boil (mental note: allow more time to heat and boil water), removed from heat, added liquid and dried malt extracts, stirred vigorously, brought back up to a boil (again, I’ve underestimated how long it takes to bring even hot wort back to a boil and even had trouble keeping it at a good rolling boil – it was a very light boil). Once it was boiling again, added bittering hops. Kept at a small rolling boil for 45 minutes, added flavoring hops. Boiled 10 more minutes, added aroma hops. Boiled for 5 more minutes, then took off heat and placed pot in my sink (which was filled with some cold water and some ice) to quickly cool. This didn’t work as well as I’d hoped, and I’ll probably need more ice next time. Got the wort down to manageable temperature and poured it into my fermentation bucket (attempting to remove sediment with a controlled pour through a sanitized strainer, but wasn’t super successful with that). Added some extra water to the bucket to bring up the 5 gallon mark, pouring from high up to aerate the wort. Pitched yeast, stirred a bit, threw the cap on, and installed the airlock. Done!

Original Gravity: 1.040 (this is a bit low, but the temperature of the wort was still a bit high at the time (around 80°, which can throw off the hydrometer because calibrated for 60° measurements). Correcting for temperature, I’m estimating something around 1.042-1.043. Still 0.002 or 0.003 off from the recommended O.G., but this will hopefully still work well enough. I’m guessing the ABV will be a bit lighter than predicted, but that should be ok.)

Well, it took a lot longer than I expected (between 3-4 hours). 2.5 gallons of water plus steeped grains/malt extract takes a while get back up and running on my setup (I have an electric stove, so temperature control is limited here, and honestly, it was even a bit difficult to keep it at a good boil without putting the lid on (but you’re not supposed to do that really, so I tried to avoid that)). Part of it is also that it’s my first time, so I was trying to be attentive and didn’t really take any time away from the kitchen to do other stuff (next time I’ll probably read a book or something, knocking out two birds with one stone). I’ll need to check in tomorrow morning to (hopefully) report on the bubbling of the airlock (which would mean that fermentation is underway). In any case, it was an interesting session, and I think I’ve learned a lot, which is probably the best I should be hoping for at this point. Hopefully the next session will go a bit smoother (not to mention the wracking/bottling process for this batch).

Update 11/8/10: I was a little worried this morning when I didn’t see any activity in the airlock, but when I got home from work, all appeared to be well. I have no idea how active it’s supposed to be, but it’s going at about one bubble per 20-25 seconds. Looking around the interwebs, this seems to be ok. There are too many variables to be sure, but at least there is some bubbling going on… So now we play the waiting game.

Update 11/9/10: Well, now this thing is bubbling up a storm. Intervals between bubbling have decreased to about 3-4 seconds. Once again, no idea how active it’s supposed to be at this point, but this seems promising.

Update 11/20/10: Beer has been bottled. Read a recap here

(Cross posted at Kaedrin Weblog)